- Main
- Arts - Architecture
- Architectural Graphics
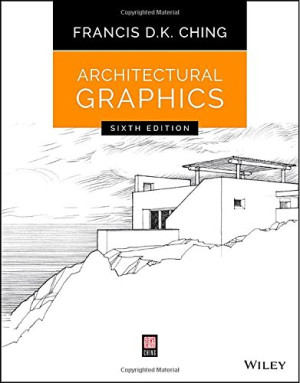
Architectural Graphics
Francis D. K. Ching你有多喜欢这本书?
下载文件的质量如何?
下载该书,以评价其质量
下载文件的质量如何?
The bestselling guide to architectural drawing, with new information, examples, and resources
Architectural Graphics is the classic bestselling reference by one of the leading global authorities on architectural design drawing, Francis D.K. Ching. Now in its sixth edition, this essential guide offers a comprehensive introduction to using graphic tools and drafting conventions to translate architectural ideas into effective visual presentations, using hundreds of the author's distinctive drawings to illustrate the topic effectively. This updated edition includes new information on orthographic projection in relation to 3D models, and revised explanations of line weights, scale and dimensioning, and perspective drawing to clarify some of the most difficult concepts. New examples of modern furniture, APA facilities, and presentation layout provide more up-to-date visuals, and the Reference Center features all new animations, videos, and practice exercises.
Architectural graphics are key tools for conveying design through representation on paper or on screen, and this book is the ultimate guide to mastering the skill, then applying your talent to create more effective design communication.
• Understand multiview, paraline, and perspective drawing
• Master interior sections using a variety of techniques
• Render tonal value, enhance depth, and convey illumination
• Develop professional-quality layouts for presentations
Architectural graphics both inform the design process and serve as the means by which a design is interpreted and built. Complete mastery of the tools and conventions is essential to the successful outcome of any project, and mistakes can cause confusion, time delays, increased costs, and possible catastrophe. Architectural Graphics is the comprehensive guide to professional architectural drawing, with insight from a leading authority in the field.
内容类型:
书籍年:
2015
出版:
6th
出版社:
Wiley
语言:
english
页:
272
ISBN 10:
111903566X
ISBN 13:
9781119035664
文件:
PDF, 72.07 MB
您的标签:
IPFS:
CID , CID Blake2b
english, 2015
在1-5分钟内,文件将被发送到您的电子邮件。
该文件将通过电报信使发送给您。 您最多可能需要 1-5 分钟才能收到它。
注意:确保您已将您的帐户链接到 Z-Library Telegram 机器人。
该文件将发送到您的 Kindle 帐户。 您最多可能需要 1-5 分钟才能收到它。
请注意:您需要验证要发送到Kindle的每本书。检查您的邮箱中是否有来自亚马逊Kindle的验证电子邮件。
正在转换
转换为 失败
关键词
关联书单






















































































































Architectural Graphics Sixth Edition Francis D.K. Ching JOHN WILEY & SONS, INC. Cover design: C. Wallace Cover image: Courtesy of Francis D.K. Ching This book is printed on acid-free paper. ∞ Copyright © 2015 by John Wiley & Sons, Inc. All rights reserved Published by John Wiley & Sons, Inc., Hoboken, New Jersey Published simultaneously in Canada No part of this publication may be reproduced, stored in a retrieval system, or transmitted in any form or by any means, electronic, mechanical, photocopying, recording, scanning, or otherwise, except as permitted under Section 107 or 108 of the 1976 United States Copyright Act, without either the prior written permission of the Publisher, or authorization through payment of the appropriate per-copy fee to the Copyright Clearance Center, 222 Rosewood Drive, Danvers, MA 01923, (978) 750-8400, fax (978) 646-8600, or on the web at . Requests to the Publisher for permission should be addressed to the Permissions Department, John Wiley & Sons, Inc., 111 River Street, Hoboken, NJ 07030, (201) 748-6011, fax (201) 748-6008, or online at . com/go/permissions. Limit of Liability/Disclaimer of Warranty: While the publisher and author have used their best efforts in preparing this book, they make no representations or warranties with the respect to the accuracy or completeness of the contents of this book and specifically disclaim any implied warranties of merchantability or fitness for a particular purpose. No warranty may be created or extended by sales representatives or written sales materials. The advice and strategies contained herein may not be suitable for your situation. You should consult with a professional where appropriate. Neither the publisher nor the author shall be liable for damages arising herefrom. For general information about our other products and services, please contact our Customer Care Department within the United States at (800) 762-2974, outside the United States at (317) 572-3993 or fax (317) 572-4002. Wiley publishes in a variety of print and e; lectronic formats and by print-on-demand. Some material included with standard print versions of this book may not be included in e-books or in print-ondemand. If this book refers to media such as a CD or DVD that is not included in the version you purchased, you may download this material at . For more information about Wiley products, visit . Library of Congress Cataloging-in-Publication Data: Ching, Frank, 1943Architectural graphics / Francis D.K. Ching. -- 6th ed. ISBN 978-1-119-03566-4 (paperback); ISBN 978-1-119-07338-3 (ebk); ISBN 978-1-119-07350-5 (ebk); ISBN 978-1-119-09099-1 (ebk) Printed in the United States of America. 10 9 8 7 6 5 4 3 2 1 Contents Preface . . . . . . . . . . . . . . . . . . . . . . . . . . . . . . . . v 1 Drawing Tools and Materials . . . . . . . . . . . . . . . . . 1 2 Architectural Drafting . . . . . . . . . . . . . . . . . . . . . 17 3 Architectural Drawing Systems . . . . . . . . . . . . . . . 29 4 Multiview Drawings . . . . . . . . . . . . . . . . . . . . . . . 49 5 Paraline Drawings . . . . . . . . . . . . . . . . . . . . . . . . 91 6 Perspective Drawings . . . . . . . . . . . . . . . . . . . . 107 7 Rendering Tonal Values . . . . . . . . . . . . . . . . . . . 147 8 Rendering Context . . . . . . . . . . . . . . . . . . . . . . 185 9 Architectural Presentations . . . . . . . . . . . . . . . . 201 10 Freehand Drawing . . . . . . . . . . . . . . . . . . . . . . 217 Index . . . . . . . . . . . . . . . . . . . . . . . . . . . . . . . . 259 About the Companion Website This book has a companion website, which can be found at: Enter the password: 111903566 The companion website contains over 100 interactive animations that support additional learning by expanding on key concepts covered throughout Architectural Graphics, Sixth Edition. If your access code is not working, please contact Wiley Customer Service at for assistance. Preface Forty years ago, the first edition of this text introduced students to the range of graphic tools, techniques, and conventions designers use to communicate architectural ideas. The prime objective behind its original formation and subsequent revisions was to provide a clear, concise, and illustrative guide to the creation and use of architectural graphics. While retaining the clarity and visual approach of the earlier editions, this sixth edition of Architectural Graphics is unique in its use of digital media to convey and clarify the essential principles of graphic communication. Advances in computer technology have significantly altered the process of architectural drawing and design. Current graphics applications range from 2D drawing programs to 3D modelers and Building Information Modeling (BIM) software that aid in the design and representation of buildings, from small houses to large and complex structures. It is therefore important to acknowledge the unique opportunities and challenges digital tools offer in the production of architectural graphics. Whether a drawing is executed by hand or developed with the aid of a computer, however, the standards and judgments governing the effective communication of design ideas in architecture remain the same. The overall chapter organization remains the same as in the fifth edition. Chapters 1 and 2 introduce the essential tools and techniques of drawing and drafting. While digital tools can augment traditional techniques, the tactile, kinesthetic process of crafting lines on a sheet of paper with a pen or pencil remains the most sensible medium for learning the graphic language of drawing. Chapter 3 introduces the three principal systems of pictorial representation— multiview, paraline, and perspective drawings—and analyzes in a comparative manner the unique viewpoints afforded by each system. Chapters 4 through 6 then focus on the principles and standards governing the conventions and uses of each of the three drawing systems, concepts that apply whether an architectural graphic is created manually or digitally. The language of architectural graphics relies on the power of a composition of lines to convey the illusion of a three-dimensional construction or spatial environment on a two-dimensional surface, be it a sheet of paper or a computer screen. While digital technology may have altered the way we input information and create perspective, paraline, and orthographic projections, a fundamental understanding of what each of the three drawing systems conveys is required of all designers. Each drawing system provides a limited view of what we are designing and representing. And an appreciation for what these viewpoints reveal—and conceal—remains indispensable in the design process. P reface / v Pr e face Although the line is the quintessential element of all drawing, Chapter 7 demonstrates techniques for creating tonal values and develops strategies for enhancing the pictorial depth of architectural drawings and conveying the illumination of spatial environments. Special thanks go to Nan-Ching Tai, who offered his invaluable expertise and assistance in preparing the examples of digital lighting. Because we design and evaluate architecture in relation to its environment, Chapter 8 extends the role of rendering to establishing context in the drawing of design proposals and indicating the scale and intended use of spaces. Chapter 9 examines the fundamental principles of graphic communication and illustrates the strategic choices available in the planning and layout of architectural presentations. Incorporated into this discussion is the original chapter on lettering and graphic symbols, which are informative and essential elements to be considered in preparing any presentation. Drawing with a free hand holding a pen or pencil remains the most direct and intuitive means we have for recording our observations and experiences, thinking through ideas, and diagramming design concepts. Chapter 10 therefore includes additional instruction on freehand sketching and diagramming. This terminal position reflects the importance of freehand drawing as a graphic skill and a critical tool for design thinking. Other than the early phases of the design process, during which we initiate ideas, there is no other area of design drawing that is better suited for freehand drawing than drawing on location—from direct observation. For this reason, the section on drawing from observation has been expanded to demonstrate how the act of seeing, responding to, and sketching spatial environments invigorates seeing, enables understanding, and creates memories. Despite substantial changes in technology over the past forty years, the fundamental premise of this text endures—drawing has the power to overcome the flatness of a two-dimensional surface and represent three-dimensional ideas in architecture in a clear, legible, and convincing manner. To unlock this power requires the ability both to execute and to read the graphic language of drawing. Drawing is not simply a matter of technique; it is also a cognitive act that involves visual perception, judgment, and reasoning of spatial dimensions and relationships. vi / Pr efa c e 1 Drawing Tools and Materials This chapter introduces the pencils and pens necessary for inscribing lines, the instruments available for guiding the eye and hand while drawing, and the surfaces suitable for receiving the drawn lines. While digital technology continues to further augment and enhance this traditional drawing toolkit, the kinesthetic act of drawing with a handheld pencil or pen remains the most direct and versatile means of learning the language of architectural graphics. D r aw in g Pe ncil s Pencils are relatively inexpensive, quite versatile, and uniquely responsive to pressure while drawing. Lead Holders • Lead holders employ standard 2 mm leads. • The push-button action of a clutch mechanism allows the exposed length of the lead shaft to be adjusted or withdrawn when the pencil is not in use. • The lead point, which is capable of a variety of line weights, must be kept well sharpened with a lead pointer. Mechanical Pencils • Mechanical pencils use 0.3 mm, 0.5 mm, 0.7 mm, and 0.9 mm leads. • A push-button mechanism advances the lead automatically through a metal sleeve. This sleeve should be long enough to clear the edges of drafting triangles and straightedges. • The relatively thin leads of mechanical pencils do not require sharpening. • 0.3 mm pencils yield very fine lines, but the thin leads are susceptible to breaking if applied with too much pressure. • 0.5 mm pencils are the most practical for general drawing purposes. • 0.7 mm and 0.9 mm pencils are useful for sketching and writing; avoid using these pencils to produce heavy line weights. Wood-Encased Pencils • Wooden drawing pencils are typically used for freehand drawing and sketching. If used for drafting, the wood must be shaved back to expose 3/4" of the lead shaft so that it can be sharpened with sandpaper or a lead pointer. All three styles of pencils are capable of producing quality line drawings. As you try each type out, you will gradually develop a preference for the characteristic feel, weight, and balance of a particular instrument as you draw. 2 / A r c hit ec t ur al Gr aph i c s Draw i n g Le ad s Recommendations for Grades of Graphite Lead 4H Graphite Leads Grades of graphite lead for drawing on paper surfaces range from 9H (extremely hard) to 6B (extremely soft). Given equal hand pressure, harder leads produce lighter and thinner lines, whereas softer leads produce denser, wider lines. Nonphoto Blue Leads Nonphoto blue leads are used for construction lines because their shade of blue tends not to be detected by photocopiers. However, digital scanners can detect the light blue lines, which can be removed by image editing software. • This dense grade of lead is best suited for accurately marking and laying out light construction lines. • The thin, light lines are difficult to read and reproduce and should therefore not be used for finish drawings. • When applied with too much pressure, the dense lead can engrave paper and board surfaces, leaving grooves that are difficult to remove. 2H • This medium-hard lead is also used for laying out drawings and is the densest grade of lead suitable for finish drawings. • 2H lines do not erase easily if drawn with a heavy hand. F and H • These are general-purpose grades of lead suitable for layouts, finish drawings, and handlettering. Plastic Leads Specially formulated plastic polymer leads are available for drawing on drafting film. Grades of plastic lead range from E0, N0, or P0 (soft) to E5, N5, or P5 (hard). The letters E, N, and P are manufacturers’ designations; the numbers 0 through 5 refer to degrees of hardness. HB • This relatively soft grade of lead is capable of dense linework and handlettering. • HB lines erase and print well but tend to smear easily. • Experience and good technique are required to control the quality of HB linework. B • This soft grade of lead is used for very dense linework and handlettering. The texture and density of a drawing surface affect how hard or soft a pencil lead feels. The more tooth or roughness a surface has, the harder the lead you should use; the more dense a surface is, the softer a lead feels. Draw i ng Tool s and M ateri als / 3 D r aw in g Pe ns Technical Pens Technical pens are capable of producing precise, consistent ink lines without the application of pressure. As with lead holders and mechanical pencils, technical pens from different manufacturers vary in form and operation. The traditional technical pen uses an ink-flow-regulating wire within a tubular point, the size of which determines the width of the ink line. There are nine point sizes available, from extremely fine (0.13 mm) to very wide (2 mm). A starting pen set should include the four standard line widths— 0.25 mm, 0.35 mm, 0.5 mm, and 0.70 mm—specified by the International Organization for Standardization (ISO). • 0.25 mm line width • 0.35 mm line width • 0.50 mm line width • 0.70 mm line width • The tubular point should be long enough to clear the thickness of drafting triangles and straightedges. • Use waterproof, nonclogging, fast-drying black drawing ink. • Keep points screwed in securely to prevent ink from leaking. • After each use, replace the pen cap firmly to prevent the ink from drying. • When pens are not in use, store them horizontally. Since digital tools have reduced the need for manual drafting, a variety of less expensive, low-maintenance technical pens have been developed. Equipped with tubular tips and waterproof, pigmentbased ink, these pens are suitable for writing, freehand drawing, as well as drafting with straightedges. They are available in point sizes that range from 0.03 mm to 1.0 mm. Some are refillable and have replaceable nibs. 4 / A r c hit ec t ur al Gr aph i c s Draw i n g P e n s Fountain Pens Fountain pens typically consist of a reservoir—either a disposable cartridge or an internal piston—containing a water-based ink that is fed to a metal nib by capillary action. While not suitable for drafting, fountain pens are ideal for writing and freehand sketching because they offer ease in drawing fluid, incisive, often expressive lines with little or no pressure. Fountain pen nibs come in extra-fine, fine, medium, and broad sizes; flat tipped nibs are also available for italic and oblique strokes. Some nibs are flexible enough that they respond to individual stroke direction and pressure. Other Drawing Pens Gel pens use a thick, opaque ink consisting of pigment suspended in a water-based gel while rollerball pens use a water-based liquid ink. Both offer similar qualities to fountain pens—they are capable of a consistent ink flow and laying down lines with less pressure than that required by regular ballpoint pens. Digital Stylus The digital equivalent of the pen and pencil is the stylus. Used with a digitizing tablet and appropriate software, it replaces the mouse and enables the user to draw in a freehand manner. Some models and software are able to detect and respond to the amount of hand pressure to mimic more realistically the effects of traditional media. Draw i ng Tool s and M ateri als / 5 D r aw in g G u i d e s T-Squares T-squares are straightedges that have a short crosspiece at one end. This head slides along the edge of a drawing board as a guide in establishing and drawing straight parallel lines. T-squares are relatively low in cost and portable but require a straight and true edge against which their heads can slide. • T-squares are available in 18", 24", 30", 36", 42", and 48" lengths. 42" or 48" lengths are recommended. • This end of a T-square is subject to wobbling. • Use this length of the straightedge. • A metal angle secured to the drawing board can provide a true edge. • T-squares with clear, acrylic straightedges should not be used for cutting. Metal T-squares are available for this purpose. • Rollers enable the parallel rule to move freely across a drawing surface. • Transparent, acrylic edges are recommended for better visibility while drawing lines. Some models are available with metal cutting edges. Parallel Rules Parallel rules are equipped with a system of cables and pulleys that allows their straightedges to move across a drawing board only in a parallel manner. Parallel rules are more expensive and less portable than T-squares but enable one to draft with greater speed and accuracy. 6 / A r c hit ec t ur al Gr aph i c s • Parallel rules are available in 30", 36", 42", 48", 54", and 60" lengths. The 42" or 48" length is recommended. Draw i n g G ui de s Triangles Triangles are drafting aids used to guide the drawing of vertical lines and lines at specified angles. They have a right angle and either two 45° angles or one 30° and one 60° angle. • 4" to 24" lengths are available. • 8" to 10" lengths are recommended. • Small triangles are useful for crosshatching small areas and as a guide in handlettering. See page 210. • Larger triangles are useful in constructing perspectives. • The 45°–45° and 30°–60° triangles can be used in combination to produce angular increments of 15°. See page 26. • Triangles are made of clear, scratch-resistant, nonyellowing acrylic to allow a transparent, undistorted view through to the work below. Fluorescent orange acrylic triangles are also available for greater visibility on the drafting surface. • Machined edges should be polished for precision and to facilitate drawing. Some triangles have raised edges for inking with technical pens. • Inner edges may be beveled to serve as finger lifts. • Keep triangles clean by washing with a mild soap and water. • Triangles should not be used as a straightedge for cutting materials. Adjustable Triangles Adjustable triangles have a movable leg that is held in place with a thumbscrew and a scale for measuring angles. These instruments are useful for drawing such inclined lines as the slope of a stair or the pitch of a roof. Draw i ng Tool s and M ateri als / 7 D r aw in g G u i d e s Compasses The compass is essential for drawing large circles as well as circles of indeterminate radii. • It is difficult to apply pressure when using a compass. Using too hard a grade of lead can therefore result in too light of a line. A softer grade of lead, sharpened to a chisel point, will usually produce the sharpest line without undue pressure. A chisel point dulls easily, however, and must be sharpened often. • An attachment allows technical pens to be used with a compass. • Even larger circles can be drawn by appending an extension arm or using a beam compass. French Curves • A variety of French curves are manufactured to guide the drawing of irregular curves. • Adjustable curves are shaped by hand and held in position to draw a fair curve through a series of points. Protractors • Protractors are semicircular instruments for measuring and plotting angles. 8 / A r c hit ec t ur al Gr aph i c s Draw i n g G ui de s Templates Templates have cutouts to guide the drawing of predetermined shapes. • Circle templates provide a graduated series of circles commonly based on fractions and multiples of an inch. Metric sizes are also available. • The actual size of a cutout differs from the drawn size due to the thickness of the lead shaft or pen tip. • Some templates have dimples to raise them off of the drawing surface while inking. • Templates are available for drawing other geometric shapes, such as ellipses and polygons, as well as symbols for plumbing fixtures and furnishings at various scales. Draw i ng Tool s and M ateri als / 9 D r aw in g G u i d e s Digital Drawing Analogous to traditional hand-drafting tools are the software capabilities of a 2D vector-based drawing program, which define lines—the quintessential element of architectural drawing— as mathematical vectors. • A straight line segment can be created by clicking two endpoints. • The weight of the stroke can be selected from a menu or by specifying its width in absolute terms (millimeters, fractions of an inch, or number of points, where 1 point = 1/72"). Digital Guides Drawing programs typically have commands to constrain the movement of points and lines to a precise horizontal, vertical, or diagonal direction. Grids and guidelines, along with snap-to commands, further aid the precise drawing of lines and shapes. • Parallel lines can be drawn by moving a copy of an existing line a specified dimension and direction. • Perpendicular lines can be drawn by rotating an existing line 90°. • Smart guides can be set to draw lines at 30°, 45°, 60°, or any specified angle. • Sloping or inclined lines can be drawn by rotating an existing line the desired number of degrees. • Guides can also be set to align or distribute the centers, lefthand or righthand edges, or tops or bottoms of line segments. • Aligning centers ges • Aligning lefthand edges 1 0 / A r c hit ec t u r al Gr ap h i c s bo ftha g le gnin li •A nd nd a ed ttom Digital Templates 2D drawing and computer-aided drafting (CAD) programs include digital templates of geometric shapes, furnishings, fixtures, as well as user-defined elements. Whether a template is physical or digital, its purpose remains the same—to save time when drawing repetitive elements. Draw i n g Aid s Erasers One of the advantages of drawing with a pencil is the ability to easily erase pencil marks. Always use the softest eraser compatible with the medium and the drawing surface. Avoid using abrasive ink erasers. • Vinyl or PVC plastic erasers are nonabrasive and will not smear or mar the drawing surface. • Some erasers are saturated with erasing fluid to erase ink lines from paper and drafting films. • Liquid erasing fluid removes pencil and ink markings from drafting film. Erasing Shields • Electric erasers are very convenient for erasing large areas and ink lines. Compact, battery-operated models are especially handy. Erasing shields have cutouts of various shapes and sizes to confine the area of a drawing to be erased. These thin, stainlesssteel shields are especially effective in protecting the drawing surface while using an electric eraser. Ones that have squarecut holes allow the erasure of precise areas of a drawing. Other Aids • Drafting brushes help keep the drawing surface clean of erasure fragments and other particles. • Soft, granular drafting powder is available that provides a temporary protective coating over drawings during drafting, picks up pencil lead dust, and keeps the drawing surface clean. If used too heavily, the powder can cause lines to skip, so use sparingly, if at all. • Pounce powder may be used to prepare drawing surfaces for inking. Draw i ng Tool s and M ateri als / 1 1 D r aw in g S cal e s In drawing, “scale” refers to a proportion determining the relation of a representation to the full size of that which is represented. The term also applies to any of various instruments having one or more sets of precisely graduated and numbered spaces for measuring, reading, or transferring dimensions and distances in a drawing. Architect’s Scales An architect’s scale has graduations along its edges so that scale drawings can be measured directly in feet and inches. • Triangular scales have 6 sides with 11 scales, a fullsize scale in 1/16" increment, as well as the following architectural scales: 3/32", 3/16", 1/8", 1/4", 1/2", 3/8", 3/4", 1", 1 1/2", and 3" = 1'-0". • Flat-beveled scales have either 2 sides with 4 scales or 4 sides with 8 scales. • 1/8" = 1'-0" 1 2 / A r c hit ec t u r al Gr ap h i c s • Both 12" and 6" lengths are available. • Scales should have precisely calibrated graduations and engraved, wear-resistant markings. • Scales should never be used as a straightedge for drawing lines. • 1/4" = 1'-0" • To read an architect’s scale, use the part of scale graduated in whole feet and the division of a foot for increments smaller than a foot. • 1/2" = 1'-0" • The larger the scale of a drawing, the more information it can and should contain. Draw i n g S c a l e s Engineer’s Scales • 1" = 10' • 1" = 100' • 1" = 1000' An engineer’s scale has one or more sets of graduated and numbered spaces, each set being divided into 10, 20, 30, 40, 50, or 60 parts to the inch. Metric Scales Metric scales consist of one or more sets of graduated and numbered spaces, each set establishing a proportion of one millimeter to a specified number of millimeters. • Common metric scales include the following: 1:5, 1:50, 1:500, 1:10, 1:100, 1:1000, 1:20, and 1:200. Digital Scale In traditional drawing, we think in real-world units and use scale to reduce the drawing to a manageable size. In digital drawing, we actually input information in real-world units, but we should be careful to distinguish between the size of the image viewed on a monitor, which can be reduced and enlarged independent of its realworld size, and the scale of the output from a printer or plotter. Draw i ng Tool s and M ateri als / 1 3 D r aw in g S u r faces The transparency of tracing papers and films makes them effective for overlay work, allowing us to copy or work on a drawing while seeing through to an underlying drawing. Tracing Papers Tracing papers are characterized by transparency, whiteness, and tooth or surface grain. Fine-tooth papers are generally better for inking, whereas medium-tooth papers are more suitable for pencil work. Sketch-Grade Tracing Paper Inexpensive, lightweight tissue is available in white, cream, and yellow or buff colors in rolls 12", 18", 24", 30", and 36" wide. Lightweight trace is used for freehand sketching, overlays, and studies. Use only soft leads or markers; hard leads can tear the thin paper easily. Vellum Vellum is available in rolls, pads, and individual sheets in 16, 20, and 24 lb. weights. While medium-weight 16 lb. vellum is used for general layouts and preliminary drawings, 20 lb. vellum with 100% rag content is a more stable and erasable paper used for finished drawings. Vellum is available with nonreproducible blue square grids, subdivided into 4 x 4, 5 x 5, 8 x 8, or 10 x 10 parts to the inch. Drafting Film Drafting film is a clear polyester film that is durable, dimensionally stable, and translucent enough for clear reproductions and overlay work. The film is 3 to 4 mil thick and available in rolls or cut sheets. One or both sides may have a nonglare, matte finish suitable for pencil or ink. Only compatible leads, inks, and erasers should be used. Ink lines are removable with erasing fluid or a vinyl eraser saturated with erasing fluid. 1 4 / A r c hit ec t u r al Gr ap h i c s • Drafting tape or dots are required to fix a sheet of vellum or film to the drawing board. Do not use normal masking tape, which can tear the paper surface upon removal. Drawin g Surfa c e s Layer 1 Layer 1 + 2 Digital Layers CAD and 3D-modeling programs have the ability to organize sets of information in different layers. While these levels or categories can be thought of and used as the digital equivalent of tracing paper, they offer more possibilities for manipulating and editing the information they contain than do the physical layers of tracing paper. And once entered and stored, digital information is easier to copy, transfer, and share than traditional drawings. Layer 1 + 2 + 3 Layer 1 + 2 + 3 + 4 Layer 1 + 2 + 3 + 4 + 5 Draw i ng Tool s and M ateri als / 1 5 D r aw in g S u r faces Illustration Boards Illustration boards have a paper facing laminated to a cardboard backing. Illustration boards are available in single (1/16" ) and double (3/32" ) thicknesses. 100% rag paper facings are recommended for final presentations. Coldpress boards have a degree of texture for pencil work; hotpress boards have relatively smooth surfaces more suitable for inking. Some brands of illustration boards have white facing papers bonded to a middle core of white stock. Cut edges are therefore consistently white in color, making them useful for constructing architectural models. 1 6 / A r c hit ec t u r al Gr ap h i c s 2 Architectural Drafting Drafting—drawing with the aid of straightedges, triangles, templates, compasses, and scales—has been the traditional means of creating architectural graphics and representation, and it remains relevant in an increasingly digital world. Drawing a line with a pen or pencil incorporates a kinesthetic sense of direction and length, and is a tactile act that feeds back into the mind in a way that reinforces the structure of the resulting graphic image. This chapter describes techniques and pointers for drafting lines, constructing geometric figures and shapes, and performing such operations as subdividing a given length into a number of equal parts. Understanding these procedures will result in more efficient and systematic representation of architectural and engineering structures; many are often useful in freehand sketching as well. Interspersed are digital equivalents of hand-drafting techniques to illustrate the principles that underlie all drawing, whether done by hand or on the computer. D raw in g L ine s The quintessential element of architectural drawing is the line, the mark a pen or pencil leaves as it moves across a receptive surface. Controlling the pen or pencil is the key to producing good line quality and proper line weights. • Draw with a relaxed hand; do not squeeze the pencil or pen too hard. • Hold the pen or pencil a couple of inches back from the nib or point; do not hold the instrument too close to the nib or point. • Control the movement of your pen or pencil with your arm and hand, not just with your fingers. • Pull the pen or pencil as you draw; do not push the shaft of the instrument as you would a cue stick. • Look ahead to where the line is headed. Ending point: 17, 7, 0 Drawing with a pen or pencil is not only a visual experience, it is also a tactile one in which you should feel the surface of the paper, film, or illustration board as you draw. Further, it is a kinesthetic act wherein the movements of the hand and eye correspond to the line produced. Digital Drawing Starting point: 3, –2, 0 1 8 / A r c hit ec t u r al Gr ap h i c s There is a similar, but less direct, correspondence when drawing with a mouse or a stylus on a digitizing tablet, but no such parallel spatial action occurs when entering the coordinates of a line on a keyboard. Line Types All lines serve a purpose in drawing. It is essential that, as you draw, you understand what each line represents, whether it be an edge of a plane, a change in material, or simply a construction guideline. The following types of lines, whether drawn by hand or on a computer, are typically used to make architectural graphics easier to read and interpret: • Solid lines delineate the form of objects, such as the edge of a plane or the intersection of two planes. The relative weight of a solid line varies according to its role in conveying depth. • Dashed lines, consisting of short, closely spaced strokes, indicate elements hidden or removed from our view. • Centerlines, consisting of thin, relatively long segments separated by single dashes or dots, represent the axis of a symmetrical object or composition. • Grid lines are a rectangular or radial system of light solid lines or centerlines for locating and regulating the elements of a plan. • Property lines, consisting of relatively long segments separated by two dashes or dots, indicate the legally defined and recorded boundaries of a parcel of land. • Break lines, consisting of relatively long segments joined by short zigzag strokes, are used to cut off a portion of a drawing. • Utility lines consist of relatively long segments separated by a letter indicating the type of utility. Arch i t e ct ural D r afting / 1 9 L i n e We i g ht s In theory, all lines should be uniformly dense for ease of readability and reproduction. Line weight is therefore primarily a matter of width or thickness. While inked lines are uniformly black and vary only in width, pencil lines can vary in both width and tonal value, depending on the hardness of the lead used, the tooth and density of the surface, and the speed and pressure with which you draw. Strive to make all pencil lines uniformly dense and vary their width to achieve differing line weights. Heavy • Heavy solid lines are used to delineate the profiles of plan and section cuts (see pages 54 and 71) as well as spatial edges (see page 99). • Use H, F, HB, or B leads; pressing too hard to draw a bold line indicates that you are using too hard of a lead. • Use a lead holder or draw a series of closely spaced lines with a 0.3 mm or 0.5 mm mechanical pencil; avoid using a 0.7 mm or 0.9 mm pencil for drawing heavy line weights. Medium • Medium-weight solid lines indicate the edges and intersections of planes. • Use H, F, or HB leads. Light • Lightweight solid lines suggest a change in material, color, or texture, without a change in the form of an object. • Use 2H, H, or F leads. Very Light • Very light solid lines are used to lay out drawings, establish organizing grids, and indicate surface textures. • Use 4H, 2H, H, or F leads. • The visible range and contrast of line weights should be in proportion to the size and scale of a drawing. Digital Line Weights A distinct advantage to drawing or drafting by hand is that the results are immediately discernible to the eye. When using drawing or CAD software, one may select a line weight from a menu or by specifying a stroke width in absolute units (millimeters, fractions of an inch, or number of points, where 1 point = 1/72"). In either case, what one views on a monitor may not match the output from a printer or plotter. One should therefore always run a test print or plot to ascertain whether or not the resulting range and contrasts in the line weights of a drawing are appropriate. Note, however, that if changes in line weight are necessary, it is often much easier to make them in a digital drawing than in a hand drawing. 2 0 / A r c hit ec t u r al Gr ap h i c s L i n e Qu alit y Line quality refers to the crispness, clarity, and consistency of a drawn line. • The density and weight of a line should be as uniform as possible along its entire length. • Drafted lines should have a taut quality, as if stretched tightly between two points. • Avoid drawing a line as a series of short overlapping strokes. • All lines should meet crisply at corners. • When lines stop short of a corner, the resulting angle will appear to be soft or rounded. • Avoid excessive overlapping that appears out of proportion to the size of a drawing. • Dashes should be relatively uniform in length and be closely spaced for better continuity. • When dashed lines meet at a corner, a dash should continue across the angle. • A space in the corner position will soften the angle. Digital Line Quality What one sees on a computer monitor does not necessarily indicate what one will get from a printer or plotter. Judgment of line quality in a digital drawing must be deferred until one sees the actual output from a printer or plotter. • The lines produced by vector drawing programs are based on mathematical formulas and usually print or plot better than those of raster images. Arch i t e ct ural D r afting / 2 1 D ra ft in g Te ch niques General Principles • The point of the lead in a lead holder should have a taper about 3/8" long; if the taper is too short or too rounded, the point will dull quickly. • There are a variety of mechanical sharpeners available. If you use a sandpaper pad to sharpen leads, slant the lead at a low angle to achieve the correct taper. • 0.3 mm or 0.5 mm leads for mechanical pencils do not require sharpening. • Position your body to draw over the upper straightedge of a T-square, parallel rule, or triangle, never the lower edge. • Hold the pencil at a 45° to 60° angle; hold technical pens at a slightly steeper angle. • Pull the pen or pencil along the straightedge in a plane perpendicular to the drawing surface, leaving a very slight gap between the straightedge and the nib of the pen or the point of the pencil. Do not push the pen or pencil as if it were a cue stick. • Do not draw into the corner where the straightedge meets the drawing surface. Doing so dirties the equipment and causes blotting of ink lines. • Draw with a steady pace—not too fast, not too slowly—and with even pressure. This will help prevent a line from feathering or fading out along its length. • To help a pencil point wear evenly and keep it fairly sharp, rotate the shaft of the lead holder or mechanical pencil between your thumb and forefinger slowly as you draw the entire length of a line. • A line should start and end in a positive manner. Applying slight additional pressure at the beginning and ending of a stroke will help accomplish this. • Strive for single-stroke lines. Achieving the desired line weight, however, may require drawing a series of closely spaced lines. • Try to keep drawings clean by washing hands and equipment often, and by lifting and moving tools rather than dragging or sliding them across the drawing surface. • Protect the drawing surface by keeping areas of it covered with lightweight tracing paper and exposing only the area in which you are working. The transparency of the tracing paper helps maintain a visual connection to the context of the drawing. 2 2 / A r c hit ec t u r al Gr ap h i c s D r aftin g T e c h n i que s Parallel and Perpendicular Lines • When drawing vertical lines perpendicular to the edge of a T-square or parallel rule, use a drafting triangle and turn your body so that you can draw them in a manner similar to the way you draw horizontal lines. • Avoid simply drawing the vertical lines by sitting still and sliding the pen or pencil up or down the edge of the triangle. • Drawing a series of parallel lines using two triangles is useful when the series is at some angle other than the standard 30°, 45°, 60°, or 90° angle of drafting triangles. • Position the hypotenuse of one triangle against the hypotenuse of the other and align one side of the upper triangle with the given line. • Hold the bottom triangle firmly while you slide the other triangle to the desired positions. • To draw a perpendicular to a given line, first position the hypotenuse of one triangle against the hypotenuse of the other. • Align one side of the upper triangle with the given line. • Hold the bottom triangle firmly while you slide the upper triangle until the perpendicular side is in the proper position. Arch i t e ct ural D r afting / 2 3 D ra ft in g Te ch niques Subdivisions A B In principle, it is always advisable to work from the larger part to the smaller. The successive repetition of short lengths or measurements can often result in an accumulation of minute errors. It is therefore advantageous to be able to subdivide an overall length into a number of equal parts. Being able to subdivide any given length in this manner is useful for constructing the risers and runs of a stairway, as well as for establishing the coursing of such construction as a tiled floor or masonry wall. • To subdivide a line segment AB into a number of equal parts, draw a line at a convenient angle between 10° and 45° through the starting point. Using an angle that is too acute would make it difficult to ascertain the exact point of intersection. A B C • Along this line, use an appropriate scale to mark off the desired number of equal divisions. A B C • Connect the end points B and C. • Draw lines parallel to BC to transfer the scaled divisions to line AB. A 2 4 / A r c hit ec t u r al Gr ap h i c s B D r aftin g T e c h n i que s A distinct advantage of digital drawing programs is they allow us to try out graphic ideas and easily undo them if unworkable. We can lay out and develop work on screen and either print it out or save the file for future editing. Questions of scale and placement can be deferred since these aspects can be adjusted as required during the creation of the final graphic image. In hand drafting, the result of the drawing process is seen immediately but adjustments to scale and placement are difficult to make. Digital Multiplication The ability to create, move, and place copies of a line or shape is easily accomplished in digital drawing programs. • We can copy and move any line or shape a specified distance in a given direction, repeating this process as many times as necessary to achieve the desired number of equally spaced copies. A B Digital Subdivision We can subdivide any line segment in a manner similar to the process we use in hand drafting. We can also distribute lines and shapes evenly between the two endpoints of the line segment. Whether subdividing by hand drafting or in a digital drawing program, the process of working from the general to the specific, from the larger whole to the smaller parts, remains the same. A B • Given line segment AB, draw a line segment at any angle through point A and copy the line segment as many times as necessary to equal the desired number of subdivisions. • Move the last line segment to point B. • Select all of the line segments and distribute them evenly to create the desired number of equal divisions. A B Arch i t e ct ural D r afting / 2 5 D ra ft in g Te ch niques 75° 60° 45° 30° 15° Angles and Shapes We use the standard drafting triangles to construct 30°, 45°, 60°, and 90° angles. Using both 45°–45° and 30°–60° triangles in combination, we can also easily construct 15° and 75° angles. For other angles, use a protractor or an adjustable triangle. The diagrams to the left illustrate how to construct three common geometric shapes—an equilateral triangle, a square, and a pentagon. 2 6 / A r c hit ec t u r al Gr ap h i c s D r aftin g T e c h n i que s Digital Shapes 2D vector-based drawing programs incorporate a number of graphic primitives, software routines for drawing such elements as points, straight lines, curves, and shapes, all based on mathematical formulae and from which more complex graphic elements can be created. Digital shapes have two attributes: stroke and fill. • The stroke is the path that defines the boundary of a shape. • The fill is the area within the boundary of the shape, which can be left as a void or be given a color, pattern, or gradient. Digital Transformations Once created, a digital shape can be transformed by scaling, rotating, reflecting, or shearing. Any vector-based shape is easy to modify because the mathematical description of its underlying geometry is embedded in the software routine. • Vector images can be reduced or enlarged horizontally, vertically, or in both directions without degrading the quality of the image. Because vector images are resolution independent, they can be output to the highest quality at any scale. • Vector images can be rotated about a designated point to any specified angle. • Vector images can be reflected or mirrored about any specified axis. • Vector images can be sheared or skewed along a horizontal or vertical axis, or at a specified angle relative to a horizontal or vertical axis. Any of these transformations can be repeated a number of times until the desired image is achieved. Arch i t e ct ural D r afting / 2 7 D ra ft in g Te ch niques Curved Lines • To avoid drawing a mismatched tangent to a circle or curved line segment, draw the curvilinear element first. • Then draw the tangent from the circle or arc. • Care should be taken to match the pen or pencil line weights of circles and arcs to the rest of the drawing. • To draw an arc of a given radius tangent to two given straight line segments, first draw lines parallel to the given lines at a distance equal to the desired radius of the arc. • The intersection of these lines establishes the center of the desired arc. • To draw two circles that are tangent to each other, first draw a line from the center of one to the desired tangential point on its circumference. • The center of the second circle must lie along the extension of this line. Bézier Curves Bézier curves refers to a class of mathematically derived curves developed by French engineer Pierre Bézier for CAD/CAM operations. Control point Handle Anchor point Anchor point Handle Anchor point Control point 2 8 / A r c hit ec t u r al Gr ap h i c s • A simple Bézier curve has two anchor points, which define the endpoints of the curve, and two control points, which lie outside the curve and control the curvature of the path. • A number of simple Bézier curves can be joined to form more complex curves. • The colinear relationship between the two handles at an anchor point ensures a smooth curvature wherever the path changes curvature. 3 Architectural Drawing Systems The central task of architectural drawing is representing three-dimensional forms, constructions, and spatial environments on a two-dimensional surface. Three distinct types of drawing systems have evolved over time to accomplish this mission: multiview, paraline, and perspective drawings. This chapter describes these three major drawing systems, the principles behind their construction, and their resulting pictorial characteristics. The discussion does not include media that involve motion and animation, made possible by computer technology. Nevertheless, these visual systems of representation constitute a formal graphic language that is governed by a consistent set of principles. Understanding these principles and related conventions is the key to creating and reading architectural drawings. Pr oje ction D rawing All three major drawing systems result from the way a three-dimensional subject is projected onto a twodimensional plane of projection, or more simply, onto the picture plane. • Projectors transfer points on the subject to the picture plane. These projectors are also called sight lines in perspective projection. • The drawing surface or sheet of paper is the virtual equivalent of the picture plane. Three distinct projection systems result from the relationship of the projectors to each other as well as to the picture plane. Orthographic Projection • Projectors are parallel to each other and perpendicular to the picture plane. • Axonometric projection is a special case of orthographic projection. Oblique Projection • Projectors are parallel to each other and oblique to the picture plane. Perspective Projection • Projectors or sightlines radiate from a central point that represents a single eye of the observer. Once the information for a three-dimensional construction or environment has been entered into a computer, 3D CAD and modeling software can theoretically present the information in any of these projection systems. 3 0 / A r c hit ec t u r al Gr ap h i c s P ic t oria l S yst e m s When we study how each projection system represents the same subject, we can see how different pictorial effects result. We categorize these pictorial systems into multiview drawings, paraline drawings, and perspective drawings. Projection Systems Pictorial Systems Orthographic Projection Multiview Drawings • Multiview drawings consist of plans, sections, and elevations. • The principal face in each view is oriented parallel to the picture plane. Paraline Drawings • Isometrics: The three major axes make equal angles with the picture plane. Axonometric Projection • Dimetrics: Two of the three major axes make equal angles with the picture plane. • Trimetrics: All three major axes make different angles with the picture plane. Oblique Projection • Elevation obliques: A principal vertical face is oriented parallel to the picture plane. • Plan obliques: A principal horizontal face is oriented parallel to the picture plane. Perspective Projection Perspective Drawings • 1-point perspectives: One horizontal axis is perpendicular to the picture plane while the other horizontal axis and the vertical axis are parallel with the picture plane. These pictorial views are available in most 3D CAD and modeling programs. The terminology, however, may differ from what is presented here. • 2-point perspectives: Both horizontal axes are oblique to the picture plane and the vertical axis remains parallel with the picture plane. • 3-point perspectives: Both horizontal axes as well as the vertical axis are oblique to the picture plane. Archi t e ct u ra l D rawing S ystems / 3 1 Mu ltivie w D r aw ings Orthographic Projection Orthographic projection represents a threedimensional form or construction by projecting lines perpendicular to the picture plane. • Projectors are both parallel to each other and perpendicular to the picture plane. • Major faces or facets of the subject are typically oriented parallel with the picture plane. Parallel projectors therefore represent these major faces in their true size, shape, and proportions. This is the greatest advantage of using orthographic projections—to be able to describe facets of a form parallel to the picture plane
 Amazon
  Barnes & Noble
  Bookshop.org
  转换文件
转换文件 更多搜索结果
 其他特权
其他特权 
